
Wallabag on Openmediavault
I describe here the installation of Wallabag as Docker Image on Openmediavault, the necessary, other components and their setup.
The installation runs partly as a Docker image and partly as a native, on the OMV. This follows from this, that some OMV plugins are available, I prefer native operation or in my view it makes sense, central components, serving multiple clients, to operate outside of a container solution.
The system sits behind an OPNsense that runs on an Alix APU. The firewall is responsible for the Let’s Encrypt certificate and the HAProxy listens on port 443 and takes care of the transfer of the requested connection to the respective server internally.
At this point I assume, that OMV 4.X has been installed and the basic configuration has been carried out. I also refrain from presenting, how plugins are installed in the web interface. It should also be clear, how to establish a connection to the NAS using ssh and how to use the shell.
Installation and configuration of MySQL for Wallabag
After the plugin has been installed, will take care of that, that will be present on all server interfaces, network access is permitted and the administration page is activated.
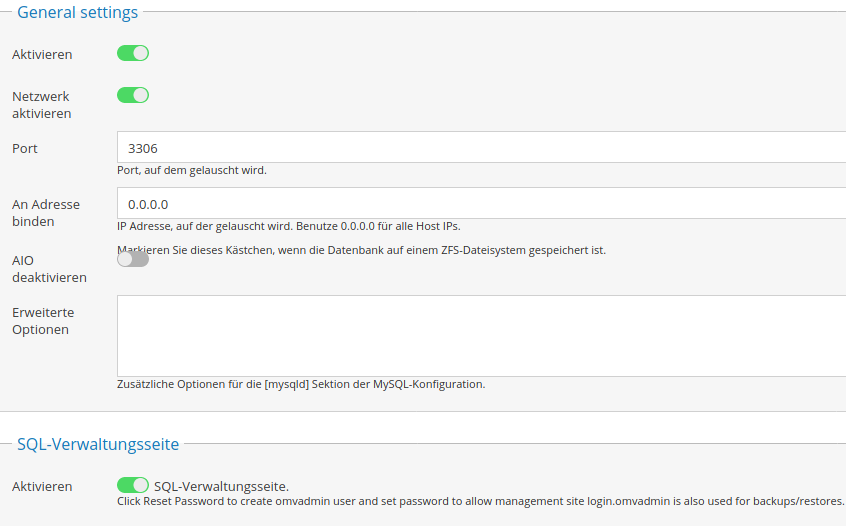
So that Wallabag can successfully establish a connection and set up the database, access must be enabled. Our Docker image runs behind the Docker proxy and therefore comes from a different network. Now there are several ways to make the settings. If you go through the MySQL WebGUI, you have to go with:
user: omvadmin
pw: which you forgave yourself during the installation or. via the button “reset Password” in the OMV / MySQL GUI.
A login with root on the web interface is currently not possible
If we run Wallabag in a Docker container, the first time root access to the database is required. I have the MySQL plugin with me “unix_socket” away, so that access is possible as before. The plugin is actually a very practical thing. For example, the plugin is set, if you run mysql secure on Debian.
sudo mysql_secure_installation
To the background, the plugin enables root access without entering a password, if you are already root / authenticated sudo. The best thing is to test it. As root or with sudo:
sudo mysql -u root
And you're already connected. All others are denied access. The next step is to reset the root password. After that, yourself, as usual from before, be logged in again with root and the password. Following 2 Examples of how it can be done, either with update or old. Depending on the MySQL variant used, that can differ.
UPADTE mysql.user SET password=password('NEUESPW') WHERE user='root';
ALTER USER 'benutzer'@'localhost' IDENTIFIED BY 'NeuesPasswort;
FLUSH PRIVILEGES;
However, that still only applies, if you are logged in as root or use sudo. If you like old times, wants to authenticate to MySQL regardless of the current login to the system, the plugin for the corresponding user must now be deleted.
UPDATE mysql.user SET plugin='' WHERE user='root'
FLUSH PRIVILEGES;
So that it stays that way even after a restart, has to /etc/mysql/debian.cnf be adjusted, especially the password line. Please enter your MySQL password here
# Automatically generated for Debian scripts. DO NOT TOUCH!
[client]
host     = localhost
user     = root
password = EUERPASSWORT
socket   = /var/run/mysqld/mysqld.sock
[mysql_upgrade]
host     = localhost
user     = root
password = EUERPASSWORT
socket   = /var/run/mysqld/mysqld.sock
basedir  = /usr
This completes the setup of MySQL.
In the MySQL administration you open under “Tools” the “User Manager”, and adds a new user root with the corresponding host, from which access is needed.
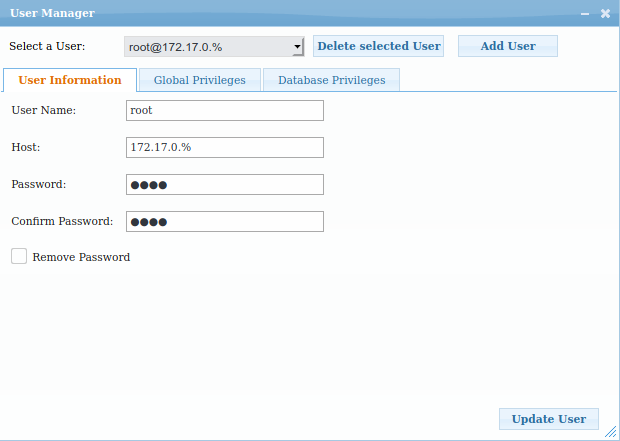
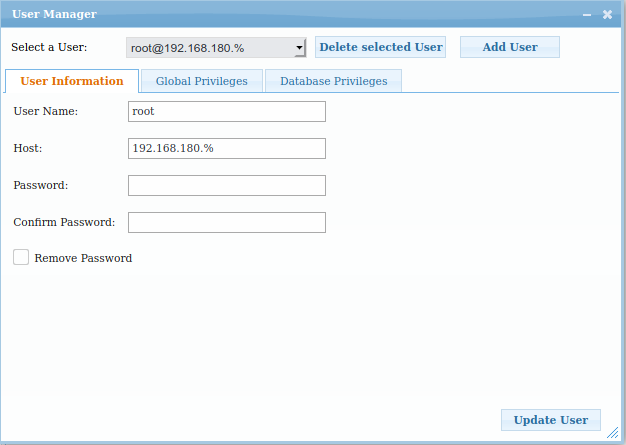
Now if we look at the table “user” in the database “mysql” look at, is the root user 3 times available, with each other, approved host, from which the database can be connected. It makes sense, for all 3 Assign the same password to entries. If anything went wrong, you can continue with “omvadmin” Sign in. In the end it looks like this
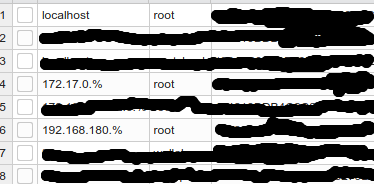
Root can now access the database from the local host, from the Docker network 172.17.0.% and access from my home network. % Percent is a placeholder and allows all clients from the corresponding network. The whole thing is of course also on the shell level. There is an order for every approved network 1, with a corresponding change, to repeat.
GRANT ALL PRIVILEGES ON *.* TO 'root'@'172.17.0.%' IDENTIFIED BY 'PASSWORT' WITH GRANT OPTION;
FLUSH PRIVILEGES;
Installation and configuration of the Redis server for Wallabag
Connect to the server using ssh and install the Redis server.
apt-get install redis-server php-redis
After installation, we take care of it, that Redis starts automatically after a restart and we want to run it right away. The whole thing happens via systemd and the command systemctl
systemctl enable redis-server.service
systemctl start redis-server.service
The file is used for configuration /etc / redis / redis.conf edited. The server can be configured as desired, such as the maximum number of connections, etc. Two lines are relevant for our purpose.
#bind 0.0.0.0
requirepass EUERPASSWORT
By commenting on the bind line, let's listen to Redis on all interfaces and accept connections. So that not everyone gets easy access, we secure the whole thing with a password. In case you have problems later and Wallabag is not able to connect to the Redis server, can you still do that protected-mode deactivate. However, this should only be used for debugging and should not be a permanent setting.
Why the Redis server?
Redis takes care of the asynchronous import at Wallabag. Who comes from another Read-It-Later service, would certainly like to take his existing bookmarks with him. My export file wasn't really big, nevertheless Wallabag did not make it, to import them completely. Bei ca. 200 Entries were then over. With the use of Redis, the import worked wonderfully. Redis can also be used for other applications. For example, Nextcloud can use it for caching.
OMV adjustments for communication
In order to allow communication from the Docker Image with our network, we contribute to the /etc/sysctl.conf the following
#net.ipv4.ip_forward=1
net.ipv4.conf.all.forwarding=1
The commented out option should actually serve the same purpose, but was no longer tested by me. In addition, a corresponding entry for iptabels must be created.
iptables -P FORWARD ACCEPT
The packets are now passed on. So that the iptables setting remains persistent and is not lost after a restart, we install the Persistent Package
apt-get install iptables-persistent
You should be asked during the installation, whether the current rules should be saved and reloaded the next time you reboot. Confirm with yes. You should make further changes, that are to be permanently saved, just enter the appropriate iptables command and then with
iptables-save
save.
Obtain and set up Docker Image
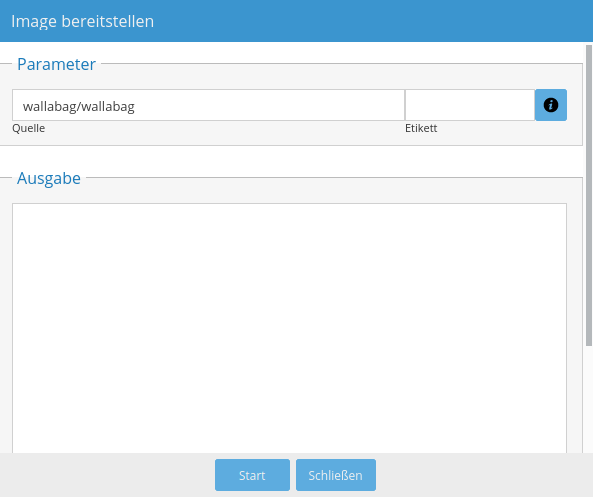
Now open the OMV WebGUI and switch to the services / Docker. First we have to get the Wallabag image. Use the button in the overview “Provide image”. Enter parameters as follows and with “Start” to confirm.
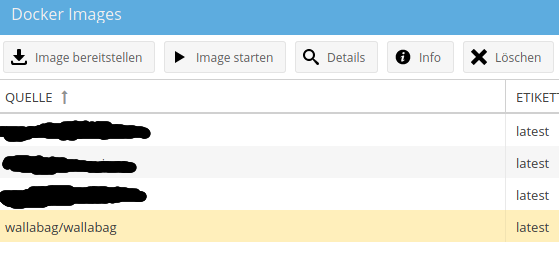
The image is now displayed as the source in the upper part. Click on the image and then on Start Image. 161526
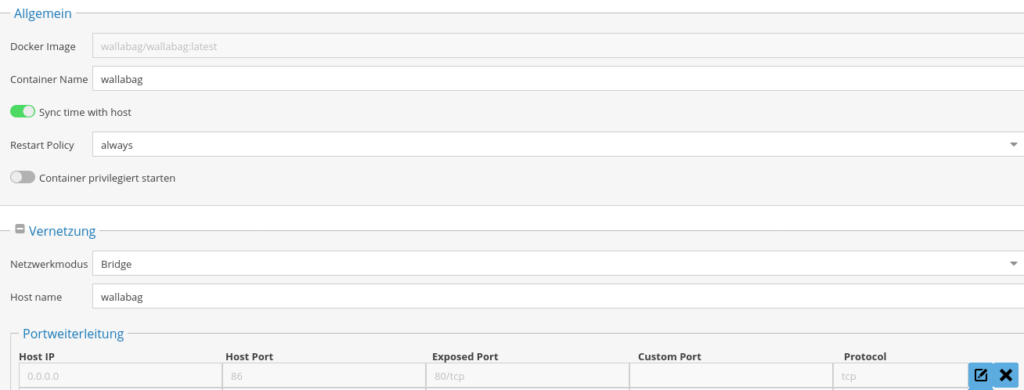
I have the container on the host port 86 configured, which is then passed on to the Docker container, on port 80. Important, after entering the network or the environment variable 161526len always that at the end + Press characters on the right, otherwise the setting will not be saved. Finally, the whole thing should look like this
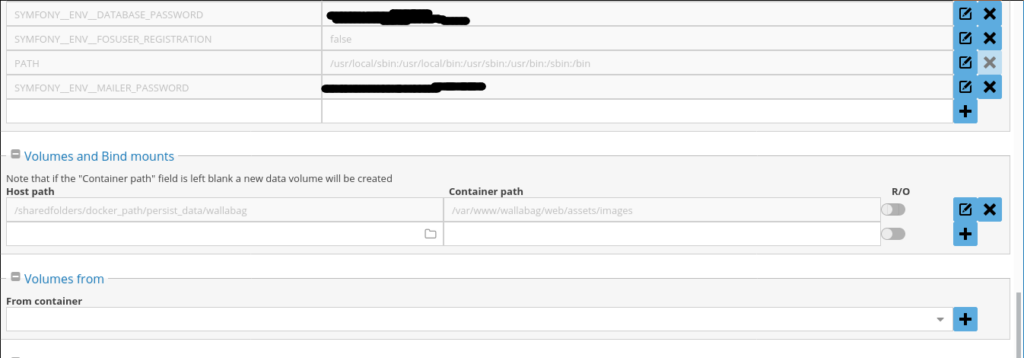
It's best to look at the information on DockerHub, what variables and directories can be configured / got to.
https://hub.docker.com/r/wallabag/wallabag/
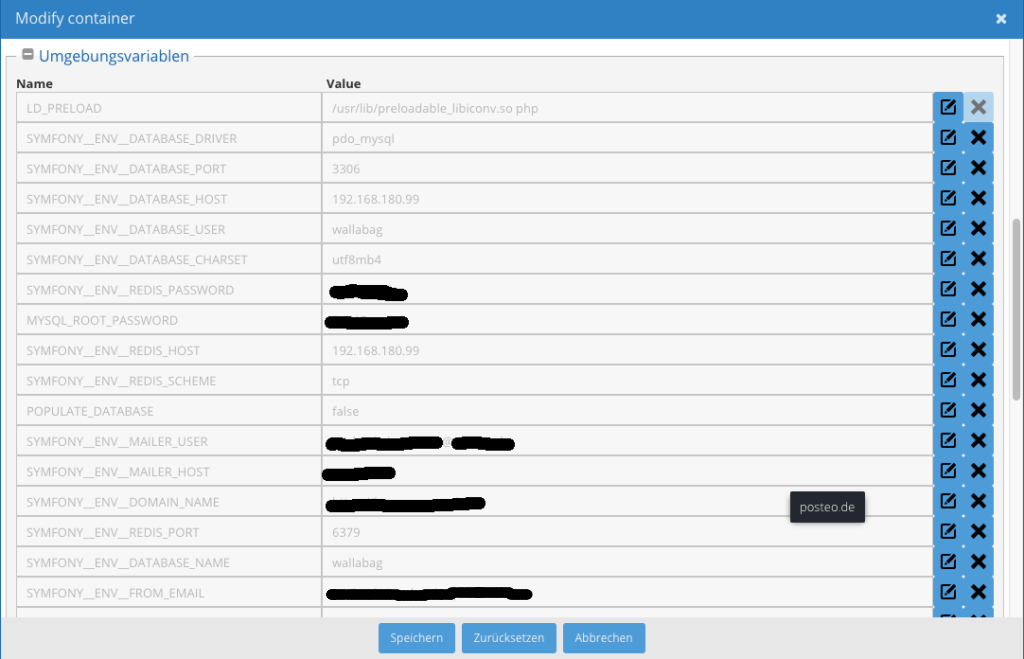
!!!IMPORTANT!!!. When the Docker Container is started for the first time, Wallabag tries to set up the database, therefore the variable POPULATE_DATABASE not be set. Otherwise the setup will not be carried out. I set the option later, so that is clear, the DB already exists.
The whole thing can of course also via shell or in the GUI Extra Argue using a command line.
docker run --name wallabag -v
/sharedfolders/docker_path/persist_data/wallabag:/var/www/wallabag/web/assets/images
-e "MYSQL_ROOT_PASSWORD=ROOT_PW"
-e "SYMFONY__ENV__DATABASE_DRIVER=pdo_mysql"
-e "SYMFONY__ENV__DATABASE_HOST=192.168.180.99"
-e "SYMFONY__ENV__DATABASE_PORT=3306"
-e "SYMFONY__ENV__DATABASE_NAME=wallabag"
-e "SYMFONY__ENV__DATABASE_USER=wallabag"
-e "SYMFONY__ENV__DATABASE_PASSWORD=WALLABAG_DBUSER_PW"
-e "SYMFONY__ENV__DATABASE_CHARSET=utf8mb4"
-e "SYMFONY__ENV__MAILER_HOST=MAIL_HOST" Openmediavault Settings Docker
-e "SYMFONY__ENV__MAILER_USER=Email_Adresse"
-e "SYMFONY__ENV__MAILER_PASSWORD=EMAIL_PW"
-e "SYMFONY__ENV__FROM_EMAIL=EMAIL_VON"
-e "SYMFONY__ENV__FOSUSER_REGISTRATION=false"
-e "SYMFONY__ENV__DOMAIN_NAME=DOMAIN_URL"
-e "SYMFONY__ENV__REDIS_SCHEME=tcp"
-e "SYMFONY__ENV__REDIS_HOST=192.168.180.99"
-e "SYMFONY__ENV__REDIS_PORT=6379"
-e "SYMFONY__ENV__REDIS_PASSWORD=REDIS_PW"
Now you can click on save at the end of the page and the container should start. After a few minutes you should also be able to register on the Wallabag web interface. User and PW is each “wallabag”. On the MySQL administration page you can see whether a database has been created. You can now create additional users in the Wallabag WebInterface, Create secrets for clients etc. 161526
I wanted to make my actual user the main user and cut the default wallabag user. To add a new admin user, open a shell on the OMV and issue the following command
docker exec -t wallabag /var/www/wallabag/bin/console fos:user:create --super-admin --env=prod USERNAME USER@EMAIL.de PASSWORT
Before you start importing, the PHP configuration in the container should be adjusted. For this we connect to the container and make the setting there.
docker exec -ti wallabag /bin/sh
Now you are in the container and can make adjustments there. Opens the file in the editor /etc/php7/php.ini Sets the parameters as follows or. for your needs
; Maximum execution time of each script, in seconds
; http://php.net/max-execution-time
; Note: This directive is hardcoded to 0 for the CLI SAPI
max_execution_time = 300
; Maximum amount of memory a script may consume (128MB)
; http://php.net/memory-limit
memory_limit = 256M
You can now start the import on the configuration page of Wallabag. To do this, select the respective provider and upload your file. When Redis is activated and Wallabag is connected, nothing should happen next, because the actual import process must be started in the terminal. Please specify the appropriate provider
docker exec -t wallabag /var/www/wallabag/bin/console wallabag:import:redis-worker --env=prod pinboard
The import starts now and you can have a look at the activity in Redis. Simply opens the Resdis monitor
redis-cli -a REDISPW monitor
It can happen that the import stops at some point, but has not yet been completed. Starts the import process again and the rest of the queue is processed. Repeat this so many times, until you can no longer see any action in the Redis Monitor, after executing the import command.
In the next article I show the configuration of a HAProxy that runs on the OPNSense and accepts the connections and secures the whole thing with a Let’s Encrypt certificate. HAProxy on OPNsense Firewall with Lets Encrypt